Windows 终端美化
这里的Win终端是
Windows Terminal,旧系统可能没有自行下载 aka.ms短链接——terminal
( ̄▽ ̄)*
终端字体替换,背景透明添加半透明图像
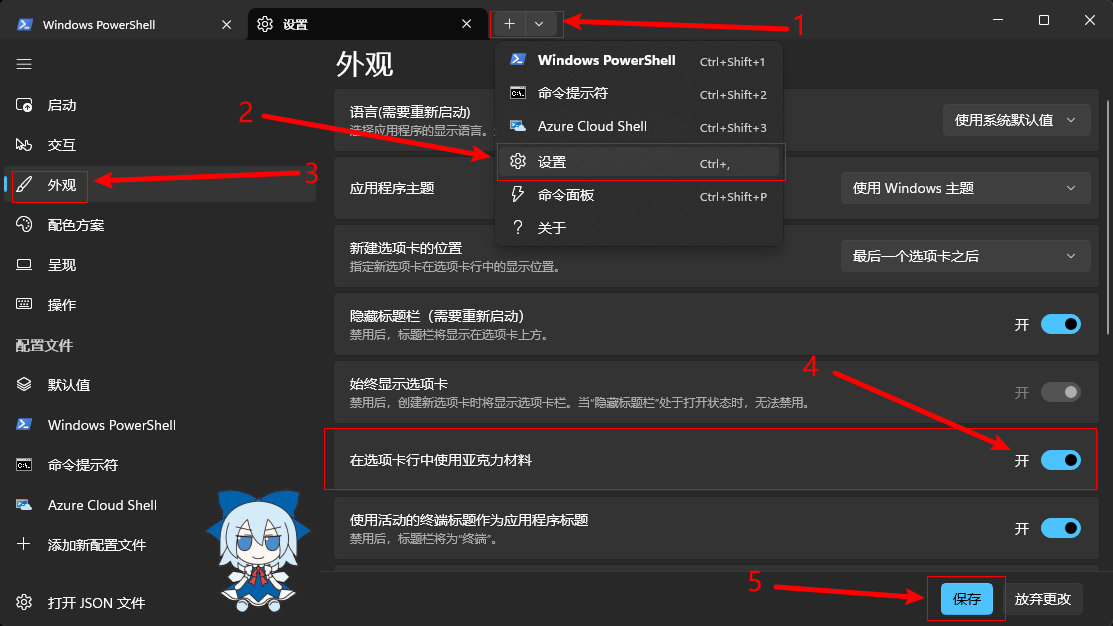
终端>设置>外观>在选项卡行中使用亚克力材料>保存
也可以在JSON文件找到并修改"useAcrylicInTabRow": false为true
你可以打开JSON文件修改配置参数
也可以点击Shell(默认值)>外观
文本、光标、背景图像、文本格式化、透明度、窗口自行修改然后保存
JSON默认参数基本如下
1 | "profiles": |
如果要配置每个shell不同外观就在需要的shell下配置不同参数
默认配置在defaults下配置参数
外观基本参数如下
名称 "name": "shell"
图标,注意路径是双斜杠\\ "icon": "图标路径"
自定义背景颜色为天依色 "background": "#66CCFF"
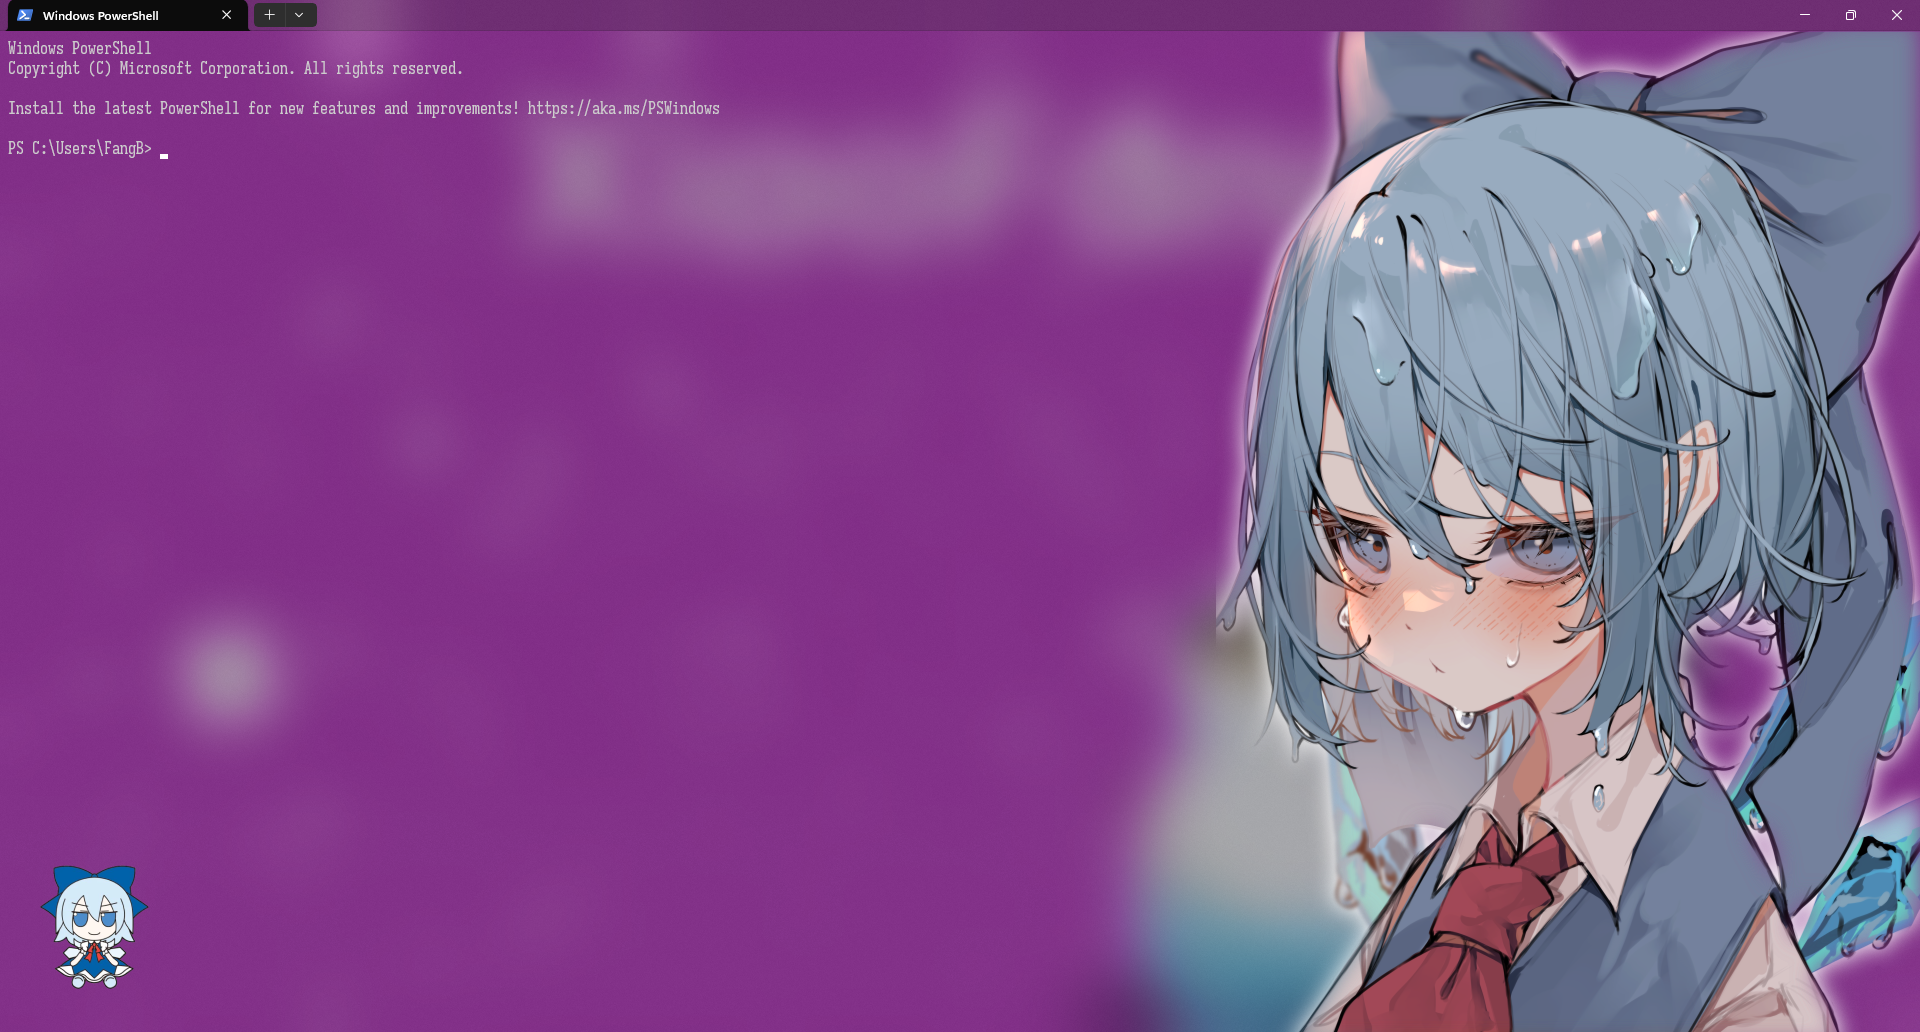
开启亚克力材料 "useAcrylic": true 关闭为 false
背景图像拉伸模式 "backgroundImageStretchMode": "uniform"
uniform——均匀、uniformToFill——均匀填充、fill——填充、none——无。
设置背景透明度 "opacity": 0~100
背景图像路径,这里注意路径是双斜杠\\ "backgroundImage": "图片路径"
背景透明度 "backgroundImageOpacity": 0~1.0
光标 "cursorShape": "vintage"
vintage——复古、bar——条形、underscore——下划线、doubleUnderscore——双下划线、filledBox——实心框、emptyBox——空心框。
复古风格的终端效果"experimental.retroTerminalEffect": true
如果你配置完之后没有透明效果,设置>个性化>颜色>透明效果 开✅
字体配置如下
1 | "font": |
如果要 启用无焦点亚克力 需要在Miccrosoft Stor中下载Windows Terminal Preview终端预览版
aka.ms短链接——Windows Terminal Preview
无焦点亚克力配置如下
1 | "unfocusedAppearance": |
我的配置如下,字体、图片路径、guid自行修改
关于终端GUID 可以看微软——Windows 终端中的 JSON 片段扩展
1 | "profiles": |
我用的字体是等距更纱黑体
来源GitHub——be5invis/Sarasa-Gothic
来源つね@FANBOX始めました——pixixv——113307672
Oh My Posh
安装
Oh My Posh是终端个性化工具
Winget
winget install JanDeDobbeleer.OhMyPosh -s wingetScoop
scoop install https://github.com/JanDeDobbeleer/oh-my-posh/releases/latest/download/oh-my-posh.json
为了重新加载 PATH ,建议重新启动您的终端。如果 oh-==my==-posh 未被识别为命令,您可以再次运行安装程序,或手动将其添加到您的 PATH 中。例如:
$env:Path += ";C:\Users\user\AppData\Local\Programs\oh-my-posh\bin"
字体
不安装并更换字体,图标会乱码
选择安装字体
1 | oh-my-posh font install |
或者去官网下载安装 nerdfonts
用其他字体因为缺失图标需要用字体修补程序font-patcher进行修补,有时间再水篇文。
powershell配置
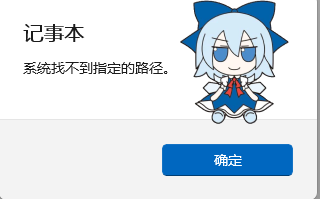
编辑PowerShell 配置文件脚本
1 | notepad $PROFILE |
如果系统找不到指定的路径
就新建PowerShell配置文件脚本
1 | New-Item -Path $PROFILE -Type File -Force |
脚本路径C:\Users\用户名\Documents\WindowsPowerShell\Microsoft.PowerShell_profile.ps1
配置文件脚本添加以下内容
1 | oh-my-posh init pwsh | Invoke-Expression |
CMD配置
安装clink
scoop install main/clink
将 Oh My Posh 与 Clink 集成很简单:在 Clink 脚本目录中创建一个名为 oh-my-posh.lua 的新文件
(在 cmd 中运行 clink info 以查找该文件的位置)。
1 | load(io.popen('oh-my-posh init cmd'):read("*a"))() |
自动运行clink
1 | clink autorun install |
更换主题
显示可用主题
1 | Get-PoshThemes |
样式与配置具体参考OhMyPosh——Themes
更换主题,修改PowerShell 配置文件脚本
1 | ##打开配置文件 |
修改cmd 要使用绝对路径,正斜杠
1 | load(io.popen('oh-my-posh init cmd --config C:/Users/用户名/AppData/Local/Programs/oh-my-posh/themes/jandedobbeleer.omp.json'):read("*a"))() |
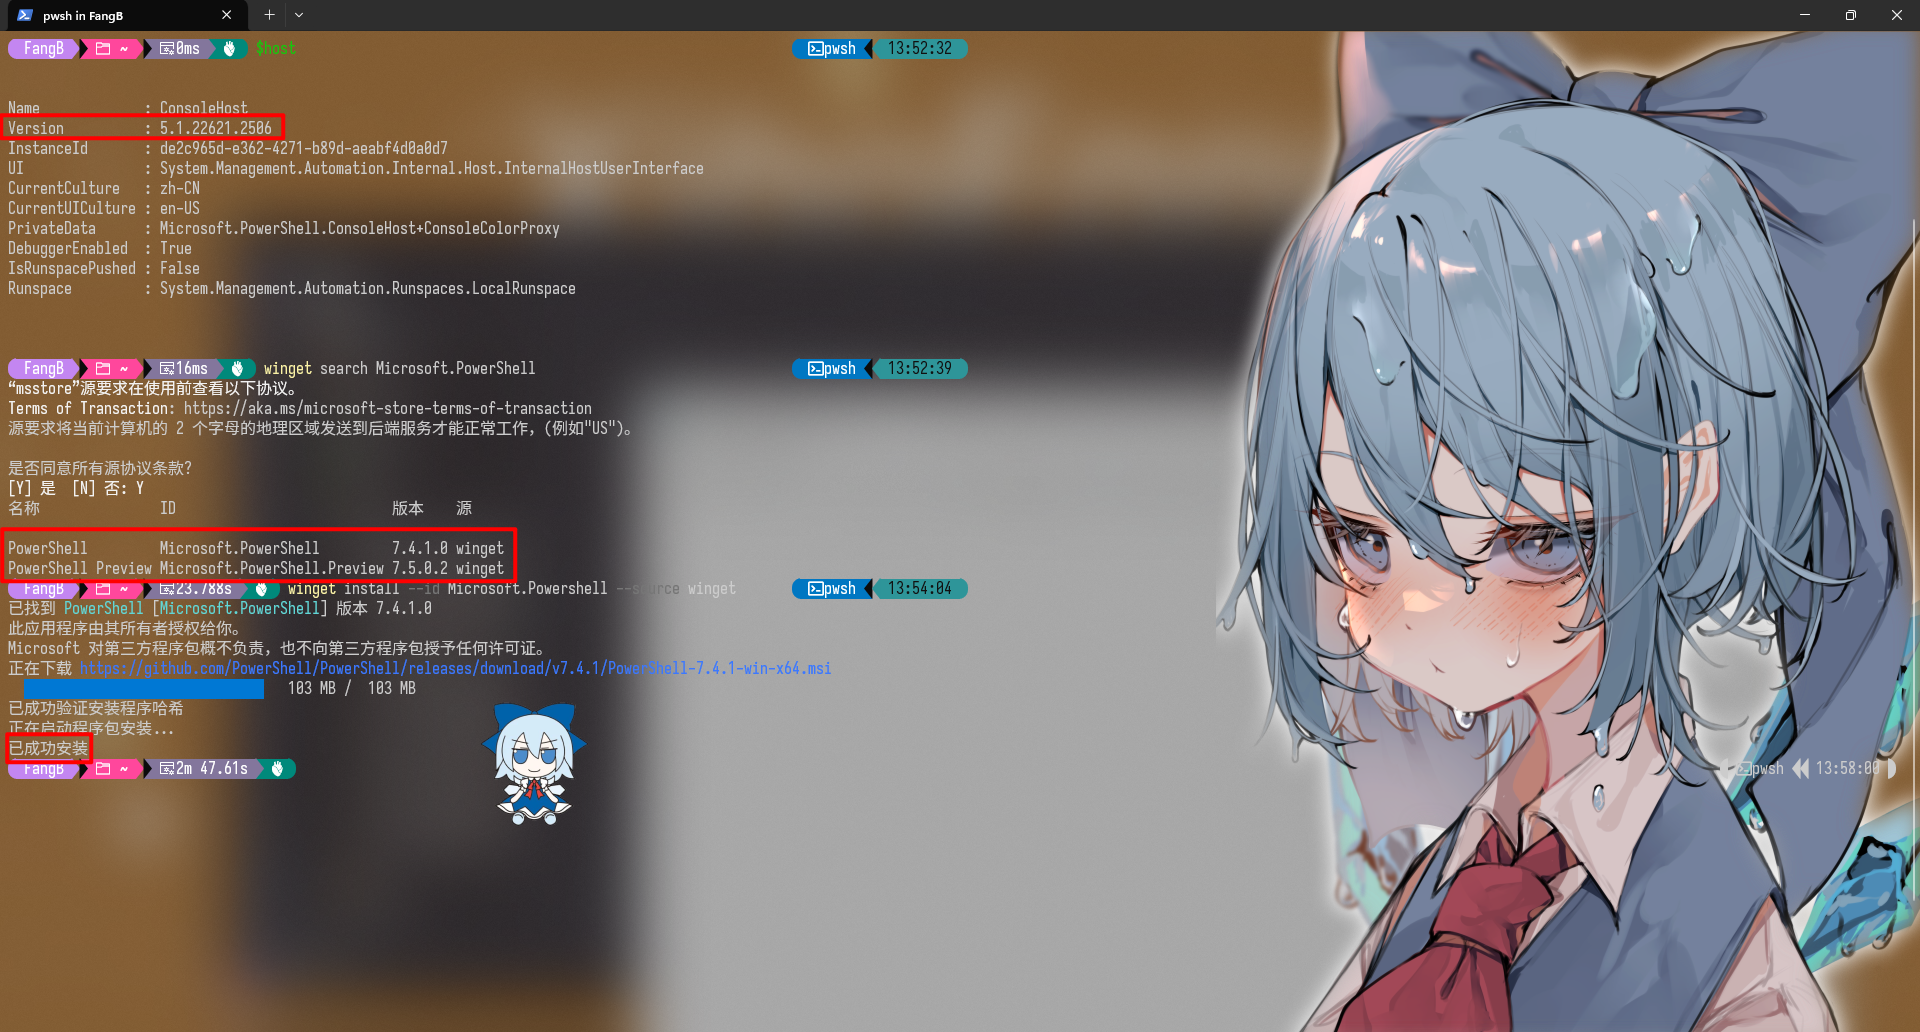
PowerShell 版本更新
1 | ##查看系统版本 |
这里注意新版要重新配置oh my posh
设置>启动>默认配置文件>PowerShell
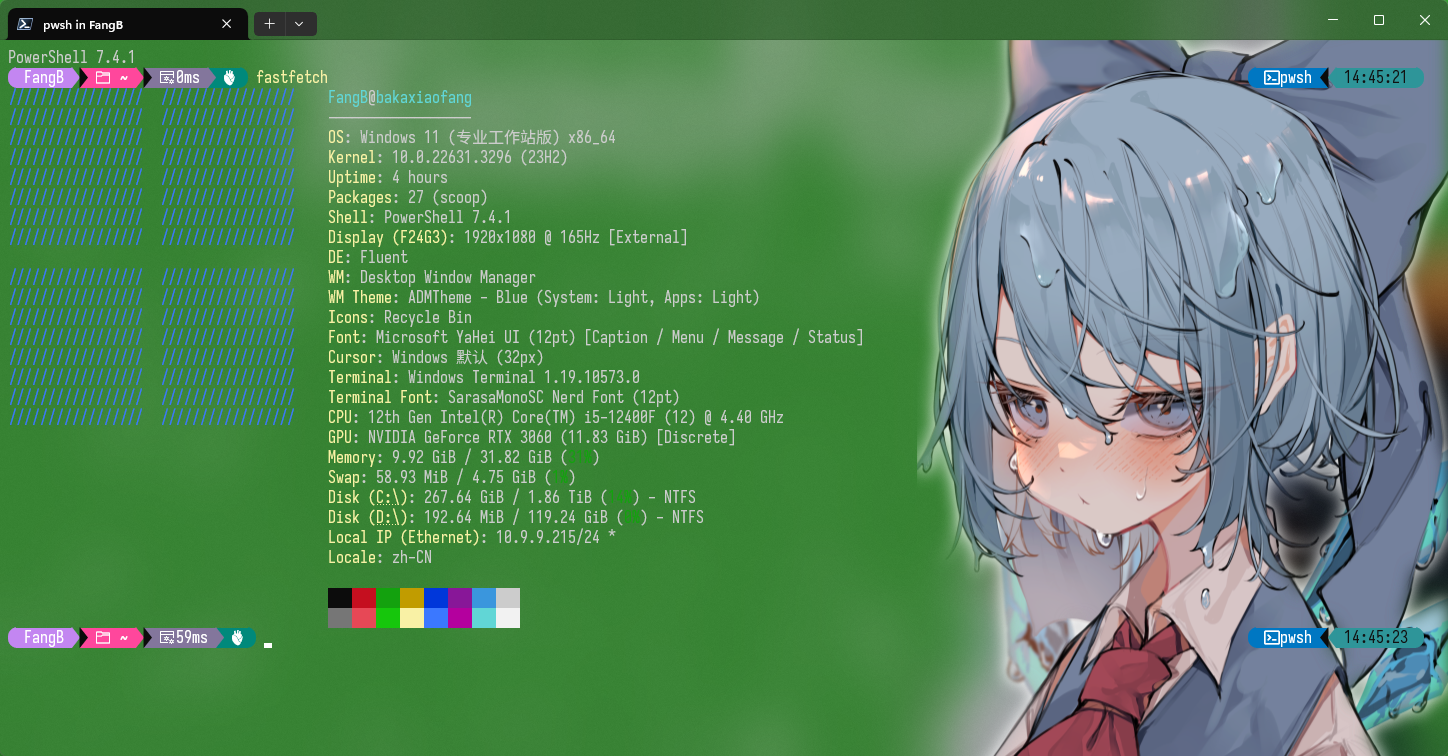
fastfetch
安装
scoop install main/fastfetch
还有一个neofetch,但那个太旧了
运行
默认配置下运行 fastfetch
如果要修改,导出默认配置文件
1 | fastfetch --gen-config jsonc |
用编辑器修改配置文件
1 | cd ~/.config/fastfetch |